By:
By: 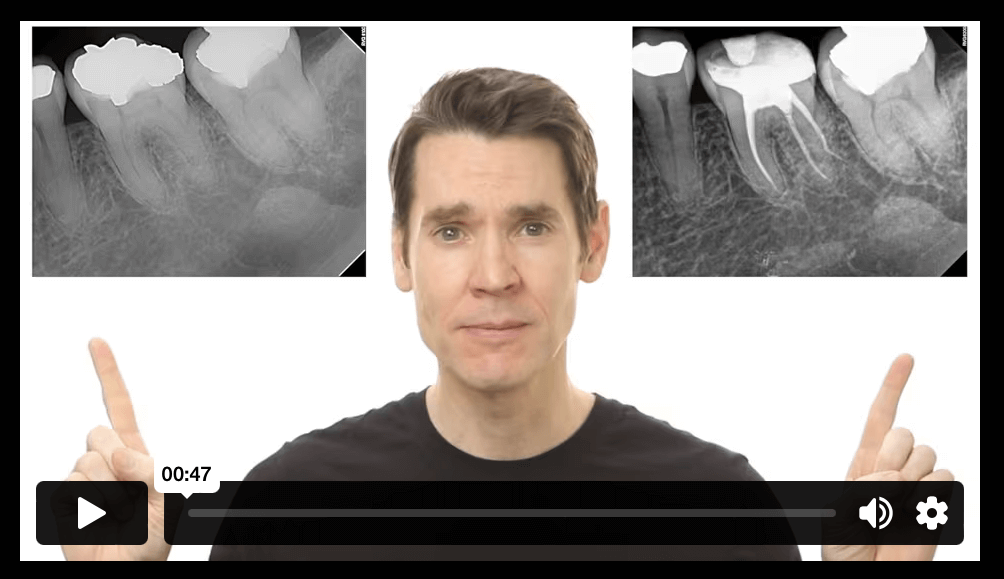
To watch the full video, including more details for each step, visit NuEndoOnline.com
In the world of endodontics, achieving predictable results hinges upon developing an understanding of the finer nuances within the technique itself. This knowledge empowers practitioners to not only stay one step ahead but also troubleshoot effectively when the unexpected arises. The key to this predictability lies in framing endodontic techniques in a logical and comprehensive manner.
Conventional endodontic education often oversimplifies the process, boiling it down to a mere three steps: shaping, cleaning, and sealing the root canal system. However, such a broad approach doesn't account for the complex subtleties that are vital for mastering the art of endodontics. It took me 21 steps to treat this case.
Not every case will take all these steps, some may take more and some may take less. Each endodontic case is unique, and while the number of steps may vary, our systematic approach remains unwavering.
To establish predictability, it is crucial to understand the full spectrum of concepts available and apply them judiciously. In this article, I'll provide an in-depth exploration of the steps I took to successfully treat this case. I recommend watching the full case here.
____________________________________________________________________________________
Case: The diagnosis for this tooth was symptomatic irreversible pulpitis and symptomatic apical periodontitis.
#1 Radiographically Determine Target Vertical Depth
The initial step in our comprehensive approach is to estimate the target vertical depth. This measurement extends from the tooth's occlusal surface (or incised edge) down to the pulp chamber and, in multi-rooted teeth, the furcation area. This step serves as a compass for selecting the appropriate burr length, ensuring precise and safe access to the tooth's pulp chamber.
#2 Remove Defective Restorations/Caries
Subsequently, we proceed to the creation of the access point. Before delving into the root canal procedure, it is imperative to remove any defective restorations and carious lesions. This meticulous step ensures not only a pristine and clean treatment field but also establishes the groundwork for a predictable root canal procedure.
#3 Pre-Endodontic Build-Up
This case involves the placement of a pre-endodontic buildup, a technique that offers distinct advantages before fully accessing the pulp chamber. The decision to opt for this step hinges on specific criteria. If there's a small or no pulp exposure, it is advisable to restore the tooth promptly. In our case, there is a small pulp exposure, and this allows us to proceed with restoration without the concern of material blocking the pulp chamber.
Engaging in a pre-endodontic buildup at this juncture serves a dual purpose. Firstly, it provides a stable reference point that facilitates the maintenance of a consistent working length. Secondly, it creates a well-defined chamber where we can retain our irrigation solutions, thereby optimizing the chemo-mechanical preparation process. This restoration follows a standard restorative operating procedure, encompassing dentin conditioning, bonding, and the use of a dual-cure material, such as Geristore® (DenMat® Lompoc, CA) in this instance.
#4 Access the Pulp Chamber
With the pre-endodontic buildup successfully in place, we move on to step four--accessing the pulp chamber. The bur choice is somewhat subjective, but it's crucial to understand it's dimensions. I use a 557 cross-cut fissure bur, as it has four millimeters of cutting flutes and it's seven millimeters to the parallel shank. These dimensions can be used as a depth gauge, translating our radiographic target vertical depth clinically. If, during this stage, we fail to penetrate the pulp chamber at the expected depth, it suggests either a misdirection or a measurement discrepancy. Therefore, we meticulously advance towards the designated depth, confirming our progress, until a loss of resistance is felt.
#5 Refine the Access Outline Form
As the pulp chamber is exposed, we transition to step five by switching to a safe-ended bur. This specialized bur is designed to ensure the procedure's safety, allowing us to maneuver it across the pulpal floor to create a well-defined outline form, without the risk of perforation. This step is foundational, and its significance cannot be overstated. Take your time and ensure the access is skillfully crafted to visualize the root canal system effectively. Rushing through this stage is ill-advised, as it sets the stage for the subsequent steps in our journey.
Safe-ended burs: The carbide version, like the Endo-Z or Pulp-Shaper Bur offers reliable performance. Alternatively, for cases involving ceramic restorations, diamond safe-ended burrs, such as the LA-AXXESS bur, are preferable to prevent potential fractures or chipping.
#6 Estimate Working Length
This phase requires us to revisit our parallel periapical radiograph or cone beam scan. It is imperative to have an initial understanding of the root lengths before inserting files blindly into the canals. Though a periapical radiograph can serve this purpose, the cone beam scans offer a more accurate perspective. Using the measurement tool, we determine the distance from the root apex to the expected occlusal reference point.
In our case, we have an estimate of approximately 19 millimeters for the mesial root system, while the distal root presents a unique challenge due to the presence of a radix. In this instance, we measure approximately 16-17 millimeters for the distal lingual root. These measurements serve as the initial basis for our root canal assessment.
#7 Assess Case Difficulty
This step involves translating the estimated working length to the tooth itself. To do this, we measure a size 10 file to the estimated working length and insert it into each canal. This step enables us to assess case difficulty, as the file's passive advancement in each canal provides insights into the challenge level. This initial assessment of "free space" in the root canal system guides us in understanding the complexity of the case. The closer the files come to the estimated working length, the more manageable the case is likely to be.
#8 Orifice Modification
In cases where files fall significantly short of this mark, the additional step of an orifice opening (also referred to as orifice modification) becomes necessary. This step aim to eliminate coronal interferences and allow our files to advance further apically, ultimately paving the way for our engine-driven files.
Orifice modification involves the enlargement of the root canal system at the interface between the pulp chamber floor and the canal entrance. This early modification eliminates coronal constrictions or constrictive dentin, allowing the file to naturally advance to the estimated working length. It also ensures a more accurate working length throughout the procedure, because the working length tends to decrease as the canal is enlarged.
#9 Advance Size 10 to Estimated Working Length
After orifice modification, it's essential to reassess the canals with a size 10 hand file to understand the effect of the orrifce modification on the ease of file advancement. Check whether the size 10 file now goes to your estimated working length. If the size 10 file will not advance to the estimated working length, canal negotiation troubleshooting protocols that should be initiated. For more information regarding these troubleshooting options, consider enrolling in my Root Canal Instrumentation course on NuEndoOnline.com.
After measuring the root canal lengths, you'll have separate measurements for each canal. This is essential for understanding the tooth's anatomy and planning for instrumentation. In this step, you'll translate your estimated working length for each canal to the tooth itself. To do this, measure a size 10 hand file to the estimated working length and place it into each canal. The goal is to assess what is known as "case difficulty," which depends on how easily a size 10 file advances passively in the canal. It gives you an initial sense of how challenging the case might be based on how far the file can passively reach.
#10 Establishing a True Working Length
Once the initial assessment is complete, you'll want to establish a true working length. This step involves using an electronic apex locator to precisely determine the position of the apex. To ensure the most accurate reading, make sure all of the fluid is removed from the pulp chamber and coronal portion of the canal. This accurate working length ensures that you have a reliable clinical reference for canal instrumentation steps.
#11 Guide Path and the Final Shape
Creating a guide path is essential for predictable canal enlargement. It refers to an enlarged, smooth, and reproducible space along the entire length of the root canal system. To achieve this, start by establishing a super-loose size 10 file, followed by the use of a dedicated engine-driven guide path. This section of the video shows you exactly what I mean by a Super-Loose Size #10.
Note: It’s important to recognize when your file is showing stress. If you see the signs, get a new file!
#12 Final Irrigation Protocol
The final size of the canal shape is 100% dictated by the clinician’s final irrigation protocol. The development of a final irrigation protocol consists of three parts— the solutions, the delivery method, and the enhancement technique. Our primary objective here is to meticulously remove as much internal "bio-load" (the root canal system's internal biologic matter) as possible.
#13 Canal Drying
Once the bulk solution has been effectively evacuated, it's time to introduce our trusty paper points. At this juncture, keen observers might notice a minor challenge: a bleeding issue presenting itself in the distal lingual canal. Addressing this challenge requires a significant lesson in patience.
The key to managing most bleeding issues in root canals is giving time its due. Just as pressure stops bleeding when we have a cut on our skin, the same principle applies within the intricate canals of a tooth. We gently insert a paper point into the problematic area and then resist the urge to rush. Instead, we step away for a consultation or make a necessary phone call. It's essential to understand that bleeding stops with time.
One common mistake observed among students and inexperienced dentists is their impatience. Rather than allowing the paper point to serve its purpose, they hastily remove it and replace it with another one in quick succession. To effectively manage these situations, one must grant the canal the time it needs to cease bleeding. It's the pressure exerted by the paper point that ultimately does the job.
However, if the bleeding persists or the canal is overwhelmed with heme (blood), it could signify an issue. There might be over-instrumentation, or residual tissue could be present within the canal. In such cases, it becomes imperative to ensure the canals are thoroughly dried. If a dry canal cannot be established, the placement of calcium hydroxide and a second visit may be indicated.
#14 Initial Sealer Placement
At this stage, the obturation process begins with the first application of sealer. I prefer to use an injectable bio-ceramic sealer, because of its ease of placement, its hydrophilic nature, and its high biocompatibility.
The sealer is applied in the midroot zone, then allowed to flow naturally to the orifice level. To ensure the sealer reaches the apex, we once again enlist the aid of our paper points. This simple step carries the remaining sealer down to the working length, effectively coating the entire length of the root canal system.
During this stage, you might encounter paper point spotting (slight moisture on the tip of the paper point). But remember, it's essential to note that bio-ceramic sealer is hydrophilic, and it can handle this small amount of moisture. So, spotting or minimal heme presence is generally tolerable, as long as the canal isn’t flooding with fluid.
An important consideration to keep in mind when injecting sealer, is to prevent the sealer tip from binding within the root canal system, as this could impede the venting of sealer coronally. Keeping the sealer tip mobile and not extending it down to the apical zone is pivotal for predictability and the prevention of a surplus of sealer into the periapical tissues. This process is then repeated for all four canals, ensuring a consistent and effective sealer application throughout. With the sealer in place, we advance to the next step.
#15 Cone Fitting
With a thin coat of sealer in place, it's time to find the perfect size gutta-percha cone to fit the shape of the prepared canal space. While the root canal was initially shaped with a size 25/.04 file, I choose to use size 20/.04 cones. This slight reduction in cone size ensures that we avoid any potential binding issues, be it coronal or mid-root.
For those who adhere to a manufacturer’s matched system technique, trying the matching paper points and gutta percha cones is acceptable. However, it's a common observation that they often fail to fit perfectly. In such cases, don't hesitate to drop down to a smaller size. While a two-size reduction may be excessive, opting for one size smaller is a viable alternative.
#16 Second Sealer Application
Cone fitting involves precisely seating the cone, making sure it reaches the desired level comfortably without any resistance. Once this is achieved, another application of sealer is needed to ensure proper seal and fill any voids. In this process, the sealer is again applied at the mid-root level, enabling it to flow naturally to the coronal aspect.
#17 Cone Seating
Following the second sealer application, the pre-fit gutta percha cone is plunged to full working length through the sealer filled canal. This two-fold sealer application provides additional assurance of an adequate distribution of sealer. In our case, steps 16 and 17 were executed successively per canal. These two steps were completed and repeated in the same fashion for each of the four canals.
#18 Cone Fit Radiograph
At this stage, a crucial quality check occurs, which can influence the final outcome of the root canal procedure. We refer to this step as "Capturing a Working Image” or a “Cone Fit Image with Sealer." It allows us to assess and confirm that the obturation meets our standards before completing the case. This image is a preview of the final result. In this case, the image revealed the distal buccal canal, the radix canal (the distal lingual canal), and the mesial buccal root systems (which merge into a single portal of exit due to their confluence).
This working image serves as a critical checkpoint. If the obturation density and length meet the desired standards, it provides confirmation that we're on the right path. The unique advantage of taking a cone fit image with sealer allows the cones to remain in place if we like what we see, but also allows us to make necessary corrections prior to committing to the final obturation if we don’t. Traditional methods involve a repeated inserting and removing the cones, then drying the canal, followed by re-inserting the cones, which can be a cumbersome and unpredictable. With this approach, the flexibility to make real-time adjustments is retained. It's a powerful method for ensuring the procedure is executed flawlessly, while also simplifying the workflow. In our case, as the working image aligned with our expectations, it was time to melt away the excess cones, essentially finalizing the procedure.
#19 Cone Melting
In this case, I chose to use a traditional single cone technique. In contrast to applying internal vertical forces, we rely on a heat source and lateral movements to melt away the excess gutta percha at the orifice level.
Following the removal of the gutta percha stalks, and with a plugger in hand, a touch of vertical force is applied at the orifice level to ensure the integrity of the seal. This slight pressure can occasionally lead to the gutta percha cones advancing a tad more apically, creating what I call "gap space." This gap space can lead to obturation voids in the coronal zone and a should be avoided.
#20 Backfilling
In this step, we address any gap space or coronal voids. While some practitioners immediately choose to inject warm gutta-percha onto the bare compacted gutta percha, this can often create separation voids (or backfill voids). To prevent this from occurring, it's advisable to apply more sealer before introducing the thermoplastic gutta-percha. This material is warm, easy to work with, and ideal for filling coronal and mid-root gaps. Also, the addition of a bit more sealer at the gutta percha interface ensures a consistent opacity of the obturation material on the final radiograph.
#21 Access Closure
With the root canal system properly backfilled, it's time to secure it with a final sealing step. First the pulp chamber needs to be cleaned of all excess obturation material. Remaining tags of gutta percha are removed with our heat source; and the bio-ceramic sealer used in this procedure is hydrophilic, which means it rinses out effectively with air and water. This eliminates the need for solvents, making the process straightforward.
Choosing the right closure method is a case-by-case choice, based on the final restorative plan. Our options include:
a bonded core
a post and core
an orifice barrier followed by a sponge and a temporary restoration, or merely
a sponge and temporary restoration.
In this case, I chose to close the access with a bonded core. I used the same material that was used for the pre-endodontic buildup. Placing a final restoration at the completion of the root canal procedure minimizes the potential for leakage. Closure of the access marks the end of the procedural technique.
Before concluding the root canal procedure, the team takes post-operative images to ensure everything is in order. These images should closely resemble those of the cone fit images taken earlier. No surprises should arise at this stage if the procedure was executed correctly. And there you have it!
To sum it up, while these root canal steps may not be as simple as those traddditional "three easy steps," they provide a fresh perspective that can enhance your understanding and anticipation. This approach sees root canal treatment as a structured series of steps. It dissects complex techniques into manageable tasks, with each step acting as a building block toward the final result. All that's left now is to familiarize yourself with the available steps and follow this logical, predetermined sequence, which is exactly what I teach.
In this brief span, we've covered a wealth of information. For those seeking more in-depth insights, you can find comprehensive resources on my website, NuEndoOnline.com If you resonate with this teaching methodology, I'm confident you'll appreciate the content there.